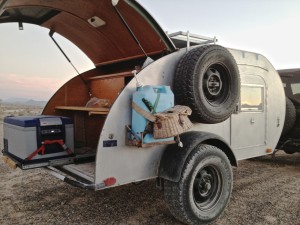
 Don’t you hate it when you’ve been camping for a few days and your ice chest is a mess of soggy food containers and yukky water? Yeah, so do we! The places we really love to camp don’t have any place to buy ice, or buy anything at all. So after many years of using a regular ice chest I wanted to upgrade to a real fridge/freezer. A wonderful device that will keep food cold and fresh well in excess of 3 days. This simple desire kicked off a huge amount of research and work. But in the end, we are super happy with the result.
There are several important components to this project: The fridge/freezer, a deep cycle battery, solar charge controller, and a solar panel. Plus mounting them.
The solar panel may have been the easiest part. I quickly determined that square was not a good shape because of the roof vent. Rectangle is the way to go because that will fit on the TearDrop roof. My neighbor Paul has been through several solar panels (one was stolen, others were upgrades), and helped me with the math to select the right size solar panel. Both neighbor Paul & my camping buddy Brian have the same 100 watt Renogy solar panel, and since they were both happy with it, (and neither has broken) I knew I would be happy too.
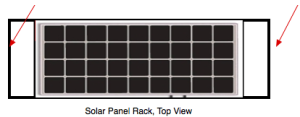 I built a mounting rack for the solar panel out of steel 1 inch square tubing painted with Rustoleum Aluminum colored paint. The outside edges (red arrows) were an after-thought, but a good one because I grab them all the time when stepping up on the tire to look around and wipe off the solar panel. The panel works a lot better when not dirty. The solar panel is mounted such that you don’t see the screws much. That is because Paul’s solar panel was unscrewed from this trailer while he was having dinner in a Mojave roadhouse. His panel screws looked too accessible I guess. Because our TD trailer has sturdy walls of 1″ thick plywood, I ran bolts through the TD walls to secure the solar panel rack. Just like the roof rack was mounted. Don’t forget to apply some silicone to seal every hole you make in the trailer.
My solar panel sits on top of the mounting bracket/ roof rack. I used the recommended solar wire which is a pair of 1 conductor stiff cables with a MC4 connector. If you want to prevent voltage drop, use slightly oversized wire. I used 10 gauge all the way to the fuse block. Bought a “solar wire extension” with those MC4 connectors and chopped in half to get 2 half size wires with the correct connectors. (Was cheapest via eBay seller with solid reviews). Ran it from the panel through a hole in the roof, slightly under the panel and covered by a clam shell vent cover then gooped up with clear silicone sealer. Wire path is from Solar Panel to Charge Controller, then out from Charge controller to fuse block, then to the fridge & other loads. There is a 12v cigarette lighter plug near the fridge for the fridge to plug into.
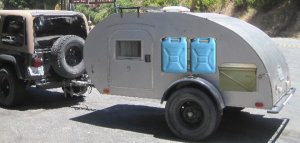
Where to put the battery? We didn’t want to give up any space! Thought about a tongue box, but as avid 4×4 off road campers, we didn’t like putting it up front in harms way. Bought an ammo can that was really too big, and considered bolting it to the side of the trailer. Next considered buying a “battery box” – most are designed for racers to mount inside the car. But they don’t look structural in the sense that they are not designed to be bolted to a wall & support a heavy battery. Realized I was going to have to make my own box. The surprise here was that the battery box turned out to be the most time intensive part of the whole project. Partly because I continued to redesign the box as I went forward. Battery box is made from steel angle iron, welded. Side plates are aluminum sheet riveted in place.
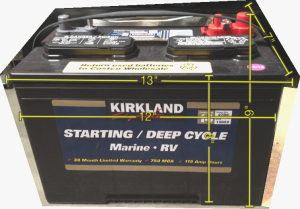
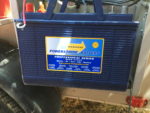
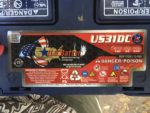
There are several types of batteries. You definitely want a Deep Cycle battery that won’t be (so) damaged by deep draining. In addition there are AGM & Gel batteries which are both sealed meaning that it is OK to mount them in the cabin area. (In a perfect world) they will not generate any gases and will not leak. Flooded batteries are the “normal” car battery kind with liquid acid in them. The same basic technology that everybody’s car has under the hood. What is interesting is that the deep cycle Flooded batteries contain about twice the power of AGM or Gel batteries of the same size, AND are about half the cost. I chose to get the biggest deep cycle battery that Costco had; 115 amp hours for about $85. Other people have chosen $200 Optima Yellow Top 55ah batteries, and needed 2 of them. So that’s $400 as compared to $85. And the more expensive takes about double the space.
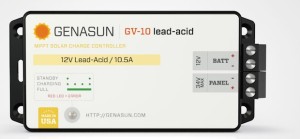
The Charge Controller is more important than people think. Basically its job is to connect the solar panel to the battery while preventing battery damage or over charging. You’ll need a charge controller that is matched to the amount of power your solar panel(s) generate.
There are 3 kinds of Charge Controllers; Shunt, PWM, and MPPT. The Shunt controllers are cheap ($20) and for good reason. Shunt controllers are simple & very inefficient. So inefficient that they waste most of your solar energy before it can get to charge your battery. Testing shows that they spend much of their time preventing your battery from being charged. Not recommended, even if free.
PWM (Pulse Width Modulation) charge controllers are a lot better than Shunt charge controllers. They have some decent technology involved, and can be a good cost-conscious purchase. However you may find that cheap PWM controllers are in fact just a shunt controller with a fancy label. Avoid those frauds, although real PWM controllers are OK.
MPPT (Maximum Power point Tracking) charge controllers are the best. They do everything right that a PWM controller does, but they have an additional trick. Most solar panels actually put out more than 12 volts. In bright sun many solar panels can generate up to 18 volts. A PWM controller will discard the excess power to protect the battery. But MPPT controllers will take that excess voltage and convert it into current so your battery can charge up faster at the correct voltage. So much more efficient that it may seem like you’ve got an extra solar panel! Some of my friends have actually bought a 2nd solar panel because their crummy shunt controller was wasting so much of their power. Maybe they should have considered a better controller first.
After doing my research, I bought a Genasun MPPT charge controller, made in USA and designed for the size system I’m using. If you choose flooded batteries as I did, open the Genesun GV10 and install the little jumper to use the charge settings for flooded batteries, as per the Genasun GV-10 manual.
The most expensive & most difficult decision was the fridge itself. These things are so expensive it made my head swim. I really agonized over spending so much money. But my mom encouraged me, saying; “The sooner you buy it, the sooner you can enjoy it for the rest of your life!” And that really helped to put things in perspective.
As a test, we tried packing Paul’s Engel MT35 as if we were going on a weekend trip & it was just too small for us. Smaller than our ice chest, even considering the space the ice takes up. Louise really loves fresh food, vegetables, & healthy snacks! Me too, and I don’t mind having a few canned beverages kept cold as well. So we had to consider something bigger than the MT35. Following are the basic choices we considered. Note that all prices are as of Sept 2014, and the very best I could find after extensive shopping. For general comparison only.
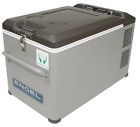 Engel MT35 AC/DC Portable Refrigerator – Freezer
$868 & Free Shipping
“Extremely durable even in harsh environments.” 2 Year Manufacturer’s Warranty Included.
External Dimensions: 25.5″ x 14.3″ x 16″ (excludes handles = 1.5″ each).
Internal Dimensions: 15.4″ x 10.8″ x 12.4″
Thoughts: Will not hold tall things, such as wine bottles. Milk fits. Probably way too small for people who love fresh food. Not all that much cheaper than the next models up. No temp readout. Dial temp knob can accidentally be turned to “Freeze” when wiping the fridge clean. Can freeze 1/2 gal milk solid overnight.
 Engel MT45F-U1 Dual Voltage AC/DC Portable Fridge/Freezer 43 Qt. $910 & Free Shipping. External: 25.5 x 14.3 x 20 inches. 2 Year Manufacturer’s Warranty.
Thoughts: Engel MT45 is as tall as the top of our counter surface. We would have to cut or raise the galley counter to make it fit. MT45 & MT35 fridges are the same dimensions inside & out, except that the MT45 is 4″ taller. Tall enough to fit wine bottles. I’m not a fan of white wine, but it was brought up as an important point by John at Expedition Exchange in Torrance CA who says the Engel MT45 is by far the most popular size.
 Engel MT60 AC/DC Fridge-Freezer $1320 & free shipping
Outside dimensions: 31.1 in. L x 19.3 in. W x 17.4 in. H . Weight: 68.3 lbs.
Inside dimensions: 20.1 in. L x 14.9 in. W x 12.4 in. H
Thoughts; The MT60 is too big front to back. We have 16″ F-to-Back, but the MT60 is 19.3″ thick.
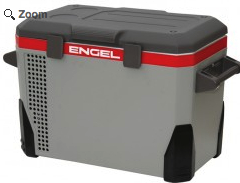
Engel MR040
External Dimensions: 25″ x 15.5″ x 18.5″ (excludes handles = 1.5” each) (LxWxH)
Internal Dimensions: 14.5″ x 10.5″ x 14.4″ (LxWxH)
THOUGHTS: MR040 is TOO THICK. Can’t close Galley door. Kind of an awkward size too. This model is plastic housing, unlike most of the Engles. Handles really stick out, but I wouldn’t want to remove them.
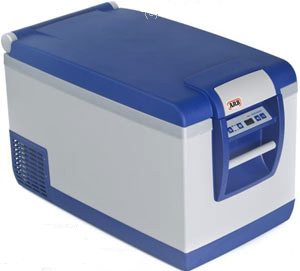 ARB 10800472 Fridge Freezer- 50 Quart
$877.8 & free shipping
Exterior Footprint: 27.75″L x 14.96″W x 20″H
–Main Compartment: 13.27″D x 11.22″W x 15.79″H
–Cool Compartment: 5.95″D x 11.22″W x 8.11″H
 ARB 10800602 Fridge Freezer – 63 Quart
$972.82 & FREE Shipping
Exterior Footprint: 33.27″L x 17.72″W x 16.85″H
— Main Compartment: 18.78″D x 13.98″W x 12.64″H
— Cool Compartment: 5.95″D x 13.98″W x 4.96″H
Thoughts: Will need to move bulkhead wall back 5″ to make it fit. Far cheaper than the Engels and with more features & longer warranty. Plastic, not metal housing. Good/bad – won’t rust or dent, but may crack or break.
Includes a LED light inside the fridge, digital temperature display, push button interface, adjustable low voltage cutoff. Removable wire basket, easy to clean, drain plug, recessed handles good for tie down. ARB is leading the way with innovations that Engel will need to incorporate. Note that if you are using the same battery I am, and if you set the ARB to a sub-freezing temp, you’re going to need to lower that low voltage cut-off to “lo” setting or the fridge will shut itself off to save the battery. Preserving the life of the battery instead of saving the Popsicles & frozen food on a camping trip is not MY priorities, I tell ya! Link to PDF of Manual.![]()
Bought for $855 + $59.99 shipping = $914.99 before ARB $75 mail-in rebate = $840 delivered. WINNER!
The Tray. By the time I got to building the slide out tray to hold the fridge, I was in such a hurry to finish before the camping trip, I didn’t take a lot of photos. The drawer sliders are: 18 Inch – 500 Lb. Heavy Duty Full Extension Drawer Slides For Toolboxes and Cabinets – 3320-18 Available many places, but in Sept 2014. I found the best deal at RealWorkTrucks.com
It would be smart to drill a hole in the tray just under the fridge’s drain plug hole.
As it turns out, we are enjoying this fridge far more than expected! Louise says that it is great being able to pack the food a day or two in advance, instead of immediately before we leave. Since we don’t need to pack ice nor frozen water bottles, we also don’t need to pack especially perishable items in soft lunchbox coolers with ice to keep them especially cold. So less strategy is involved (Louise is an Olympic class packer!) This also means that the fridge holds EVEN MORE capacity then expected. One of the best features is that the food is not sloshing around in foul ice water & spoiling on the 3rd day of camping. And since it is a real fridge, it’s also not necessary to immediately unpack it when we return home. Oh, and one more – it’s really nice to have a solar powered fridge in the backyard just in case we need the capacity, or if the city power ever goes out. All good!
UPDATES COMING. [I bought a bigger true deep-cycle 130 ah group 31 battery after wearing out the marine battery. About $190+core+tax. It is now also powering a microwave!]


